Coal Bin Pictures and Designs
-
Carbon12

- Member
- Posts: 2226
- Joined: Tue. Oct. 11, 2011 6:53 pm
- Location: Harrisburg, PA
- Stoker Coal Boiler: Keystoker KA-6
- Coal Size/Type: Rice/Anthracite
- Other Heating: Heat Pump/Forced Hot Air Oil Furnace
I'd just extend the frame with more lumber to reinforce. Triangles do distribute and support weight the best.


-
Lightning

- Site Moderator
- Posts: 14669
- Joined: Wed. Nov. 16, 2011 9:51 am
- Location: Olean, NY
- Stoker Coal Boiler: Modified AA 130
- Coal Size/Type: Pea Size - Anthracite
I would consider the straps AND the vertical supports from the top of the cone to the floor.. It needs support to take the weight away from concentrating in the center.. The downward force will try to flatten the cone.
Edit: Not only will there be a downward force, but there will also be a horizontal outward force trying to push the walls of the cone outward, is if it were a tank containing water. My reasoning for the straps around the cone being a good idea..
I also would consider vertical braces that are secured at the ceiling and floor on centers of the three sides like in this picture to support the outward forces.. This is in addition to the vertical supports from the floor to the top of the cone to support the cone. The green arrows represent the outward exerting force of the coal.
Attachments
-
northernmainecoal

- Member
- Posts: 555
- Joined: Wed. Jan. 22, 2014 8:33 am
- Location: Aroostook County, Maine
- Stoker Coal Boiler: EFM 520
- Hand Fed Coal Stove: Hitzer 30-95
- Baseburners & Antiques: Herald Baseheater #6
- Coal Size/Type: Rice/Nut/Stove
I've added a sloped cover at the bottom of the cone that leaves 4" of the auger exposed. Hopefully that will serve to address those concerns...
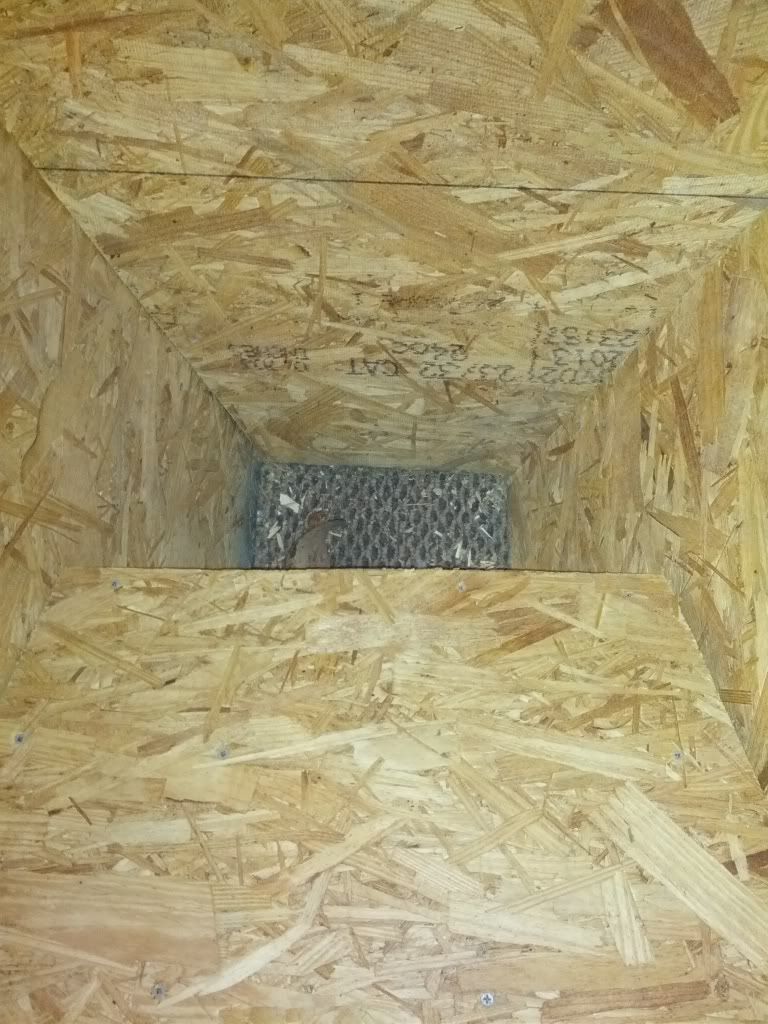
Now onto the extra bracing
Now onto the extra bracing
Last edited by northernmainecoal on Thu. Mar. 27, 2014 7:40 am, edited 1 time in total.
-
Sting

- Member
- Posts: 2983
- Joined: Mon. Feb. 25, 2008 4:24 pm
- Location: Lower Fox Valley = Wisconsin
- Other Heating: OBSO Lennox Pulse "Air Scorcher" burning NG
leave some holes in the side - constructed to allow gravity to keep the black stuff inside of the bin - but to allow you to use something to poke and break any 'bridging " fuel in that narrow fall out above the auger
-
northernmainecoal
- Member
- Posts: 555
- Joined: Wed. Jan. 22, 2014 8:33 am
- Location: Aroostook County, Maine
- Stoker Coal Boiler: EFM 520
- Hand Fed Coal Stove: Hitzer 30-95
- Baseburners & Antiques: Herald Baseheater #6
- Coal Size/Type: Rice/Nut/Stove
The bin is now full to the floor joists, no bowing cracking or any issues to speak of!!! Will post more pics in the morning. Thank you to all for the advice

I like the 275 gallon plastic container! That's what I did for living before retirement!!!! Blowmolded those babies and put them into cages!
Glad it all worked out! I was going to ask if you had a backup plan (door) to get the coal out if the auger failed but it's too late now!
Glad it all worked out! I was going to ask if you had a backup plan (door) to get the coal out if the auger failed but it's too late now!
-
northernmainecoal
- Member
- Posts: 555
- Joined: Wed. Jan. 22, 2014 8:33 am
- Location: Aroostook County, Maine
- Stoker Coal Boiler: EFM 520
- Hand Fed Coal Stove: Hitzer 30-95
- Baseburners & Antiques: Herald Baseheater #6
- Coal Size/Type: Rice/Nut/Stove
Well after I finished the bottom of the bin I got a call that coal would be on its way shortly, so that didn't exactly leave me much time to do all the bracing that had been suggested. I put up what I thought would be the most effective bracing and what I had time to do. The bin is now full to the floor joists but only ended up holding about 2.5 ton so I will angle some of the upper walls in the future to increase capacity. I'm still amazed at how well the bin held together, it hasn't shown a single sign of strain from the weight
The auger to feed the hopper worked beautifully, had no trouble starting, ran smooth with no grinding of coal.
Thanks again to all who commented
The auger to feed the hopper worked beautifully, had no trouble starting, ran smooth with no grinding of coal.
Thanks again to all who commented
Attachments
Finished bin full of coal
Filling the hopper

-
northernmainecoal
- Member
- Posts: 555
- Joined: Wed. Jan. 22, 2014 8:33 am
- Location: Aroostook County, Maine
- Stoker Coal Boiler: EFM 520
- Hand Fed Coal Stove: Hitzer 30-95
- Baseburners & Antiques: Herald Baseheater #6
- Coal Size/Type: Rice/Nut/Stove
It's possible to get another container, and the auger would swing. but my floor is not smooth enough to move the tote with a pallet jack. Unless you can come up with another way to get the coal out of the additional tote and into the boiler:)
-
tcalo

- Member
- Posts: 2072
- Joined: Tue. Dec. 13, 2011 4:57 pm
- Location: Long Island, New York
- Baseburners & Antiques: Crawford 40
- Coal Size/Type: Nut/stove anthracite
Hello, thanks for the great coal bins pics. I think I've read through every page in this section well over 100 times...  .
.
I'll try to keep it short and sweet. I've been getting bagged delivery the past few seasons, but the price difference between bulk and bagged is about $100 in these parts. I've been planning on building a bin for quite some time, it just never happened (like everything else on my to do list). I'm running a hand fed and plan on building an outdoor bin to hold 4+ tons of nut coal. I planned on building a beast of a bin but the price was just north of $1K. I planned on using all pressure treated lumber which included 4x4 posts for the floor structure and corner posts. I planned on using 3/4 plywood on the inside of the framework and T-111 to finish the outside. I know the plywood on the inside offers better structural support so I originally planned on building it this way. My only concern was flying insects making nests between the plywood and T-111. Overkill? The price of lumber forced me to scrap the bin!
I am revisiting the bin construction this summer. I simplified the structure a bit. I now plan on using 2x4 construction throughout. The base and walls will be 2x4 construction 12" on center. Instead of using 3/4 plywood and T-111 I plan on using 5/4 deck boards for the floor and walls. The wall boards will be fastened on the outside of the framework. I cut the price nearly in half constructing the bin this way.
I have a few questions. Is 2x4 construction sufficient for the weight? Will the boards on the outside of the framework hold the weight? I've seen many bins built this way so I don't think it's an issue. The bin dimensions would be 8x5x5. Thanks for any input.
I figured I'd post this since I haven't seen a hopper like this yet. Building a steel hopper for my EFM and eventually a 6 or 8" PVC chute coming into the basement from outside to dump bags into for now…. or eventually bulk if I end up using enough. I don't really need or have space for a "large" bin. Just installed the EFM in Feb. but carrying the dripping bags through the house is going to get annoying. This way I can grab bags and dump them into some type of box/funnel outside to fill the indoor hopper every few days. I'll post some finished pictures once it's all painted and installed.


-
tcalo
- Member
- Posts: 2072
- Joined: Tue. Dec. 13, 2011 4:57 pm
- Location: Long Island, New York
- Baseburners & Antiques: Crawford 40
- Coal Size/Type: Nut/stove anthracite
Alas, I completed my coal bin. Thanks for all the input from my fellow coal burners. A HUGE thank you to VigIIPeaBurner for walking me through my build by providing many pictures and answering many questions. The finished dimensions are 8x5x5 with the rear wall being 6 feet high. It should hold about 5 tons. I burn about 4 tons of nut and I wanted a bin to hold at least a seasons worth of coal with a bit of wiggle room. All framework is 12" oc, except the door slat opening is 2 feet wide. I used 5/4 deck boards on the floor to help with drainage. The removable slates are 5/4 deck boards as well. I used metal studs as a track for the slats. I painted them black, figured they would rust from the wet coal. I thought I would be saving some money from last years plans, but that went out the window when I chose cedar planks for the siding...ouch that stuff is expensive. Everything ran me just over 1K. I know, painful...but with over $100 price difference between bagged and bulk it is worth it. My options were painted T1-11 (which I feel I would still need plywood underneath for structural support), plywood and vinyl or rough cut cedar planks. I really liked the look of the cedar and don't need to do anything to it. I left a 5" tall opening in the front to shovel coal from. I constructed the roof frame out of 2x2's and mounted corrugated roofing over it. It's made of 2 4x5 sections. I planned on installing hinges on the 6' side and have both roofs swing open for deliveries, but they were so light I decided to fasten them to the bin with deck screws. They are light enough to remove for deliveries. I wanted a rustic looking bin and I think I nailed it...no pun intended! It should look nice once the wood ages a bit. I did not get a delivery yet, but it seems to be structurally sound. Cross your fingers! Hopefully I can get some video of the delivery. Enjoy the pictures. My poor daughter thought I was building her a playhouse. Wait until it gets filled with coal, it'll break her heart. I guess that's my next project!
Attachments
planned site
site prep
foundation
bin floor
frame work
the finished project
-
Dirty Steve
- Member
- Posts: 247
- Joined: Fri. Jun. 18, 2010 8:57 am
- Location: Finger Lakes Region, NYS
- Stoker Coal Boiler: Keystoker KA-6
- Coal Size/Type: Rice
- Other Heating: Oil- Off line
Nice looking bin.
-
Keepaeyeonit

- Member
- Posts: 1681
- Joined: Wed. Mar. 24, 2010 7:18 pm
- Location: Northeast Ohio.( Grand river wine country )
- Baseburners & Antiques: Glenwood #8
- Coal Size/Type: Nut & stove
- Other Heating: 49 year old oil furnace, and finally a new heat pump
Very nice work, that bin looks like it belongs there  Keepaeyeonit