That could work also Dave, and man do I wish the Crane had a larger model, cause it has the look I'm after. Window glass, and the shape will fit my enclosure perfectly. I keep visiting Ebay, Craigslist, and Google images for that perfect candidate. You people are really helping me hone in to all the necessary requirements needed to make my "final" installation permanent. I don't want to have to go through this again. These stoves are heavy. And mine is a "baby" compared to most.windyhill4.2 wrote:OR,an antique with a low back pipe will hook nicely to your current thimble & the pipe will rise from stove to thimble.Or get a low priced stove that is only a bit higher outlet & let that high draft chimney suck those flue gases down hill into the chimney.
Diary of a Surdiac
-
joeq

- Member
- Posts: 5743
- Joined: Sat. Feb. 11, 2012 11:53 am
- Location: Northern CT
- Hand Fed Coal Stove: G111, Southard Robertson

-
joeq
- Member
- Posts: 5743
- Joined: Sat. Feb. 11, 2012 11:53 am
- Location: Northern CT
- Hand Fed Coal Stove: G111, Southard Robertson
Performance up-date-
Here we are, a week B4 Christmas, a moderate winter weather-wise, stoves been burning fine for a month. Woke up this morning, to a smoldering fire-bed. B4 that, I was out of bed at 2AM due to a re-occurring cough, (due to an ending flu escapade), and the stove was burning fine. It was actually the wife that got up about 8-9AM, and said she couldn't revive the dull coals. And she's been doing good with this thing, for the past couple winters. Not sure if I could've done any better. (Would've like to have given it a shot.) Anyway, the thing dying wasn't so bad, cause the stove could've used a good ash cleaning, and glass cleaning. I'm afraid to spend much time cleaning the new panes, when it's hot.
So began another dis-assembly, and a few minor mods that I'll post in a few, with some pics.
But B4 I do that, let me just throw this out there for Lee and the group. Manometer concerns? Here you go.
Leveled and zeroed,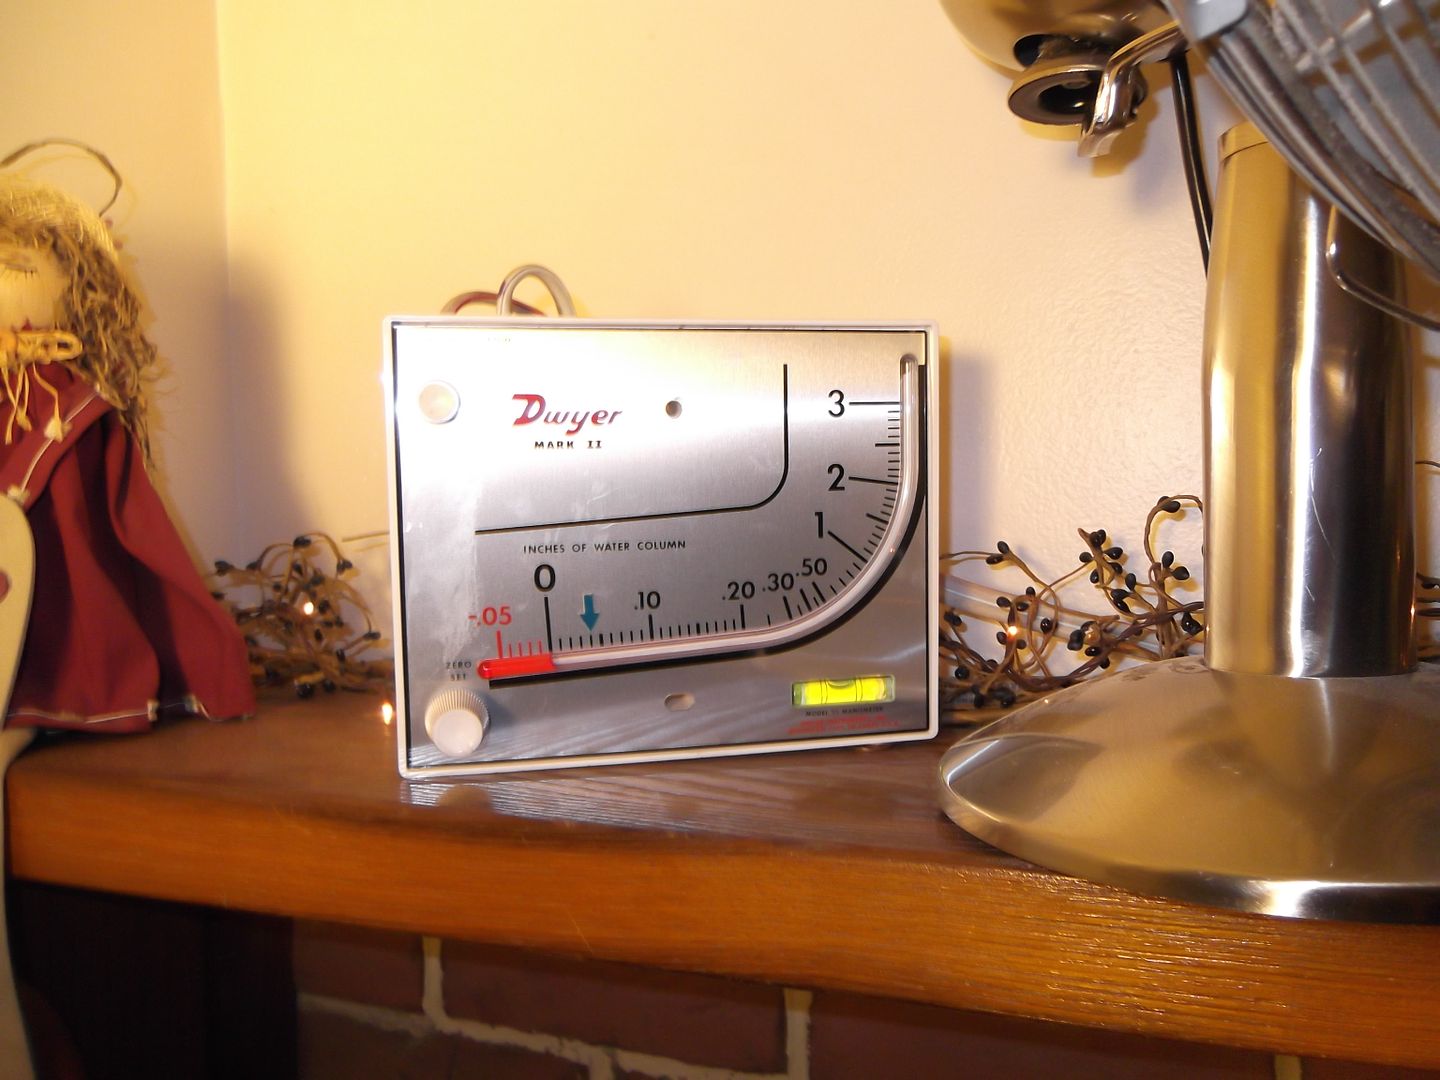
running,

Hope this eliminates the "unwanted" tension, 'specially being so close to Christmas.
(Don't look too close, but there's pennies propping that thing up.)
Here we are, a week B4 Christmas, a moderate winter weather-wise, stoves been burning fine for a month. Woke up this morning, to a smoldering fire-bed. B4 that, I was out of bed at 2AM due to a re-occurring cough, (due to an ending flu escapade), and the stove was burning fine. It was actually the wife that got up about 8-9AM, and said she couldn't revive the dull coals. And she's been doing good with this thing, for the past couple winters. Not sure if I could've done any better. (Would've like to have given it a shot.) Anyway, the thing dying wasn't so bad, cause the stove could've used a good ash cleaning, and glass cleaning. I'm afraid to spend much time cleaning the new panes, when it's hot.
So began another dis-assembly, and a few minor mods that I'll post in a few, with some pics.
But B4 I do that, let me just throw this out there for Lee and the group. Manometer concerns? Here you go.
Leveled and zeroed,

running,

Hope this eliminates the "unwanted" tension, 'specially being so close to Christmas.
(Don't look too close, but there's pennies propping that thing up.)
-
joeq
- Member
- Posts: 5743
- Joined: Sat. Feb. 11, 2012 11:53 am
- Location: Northern CT
- Hand Fed Coal Stove: G111, Southard Robertson
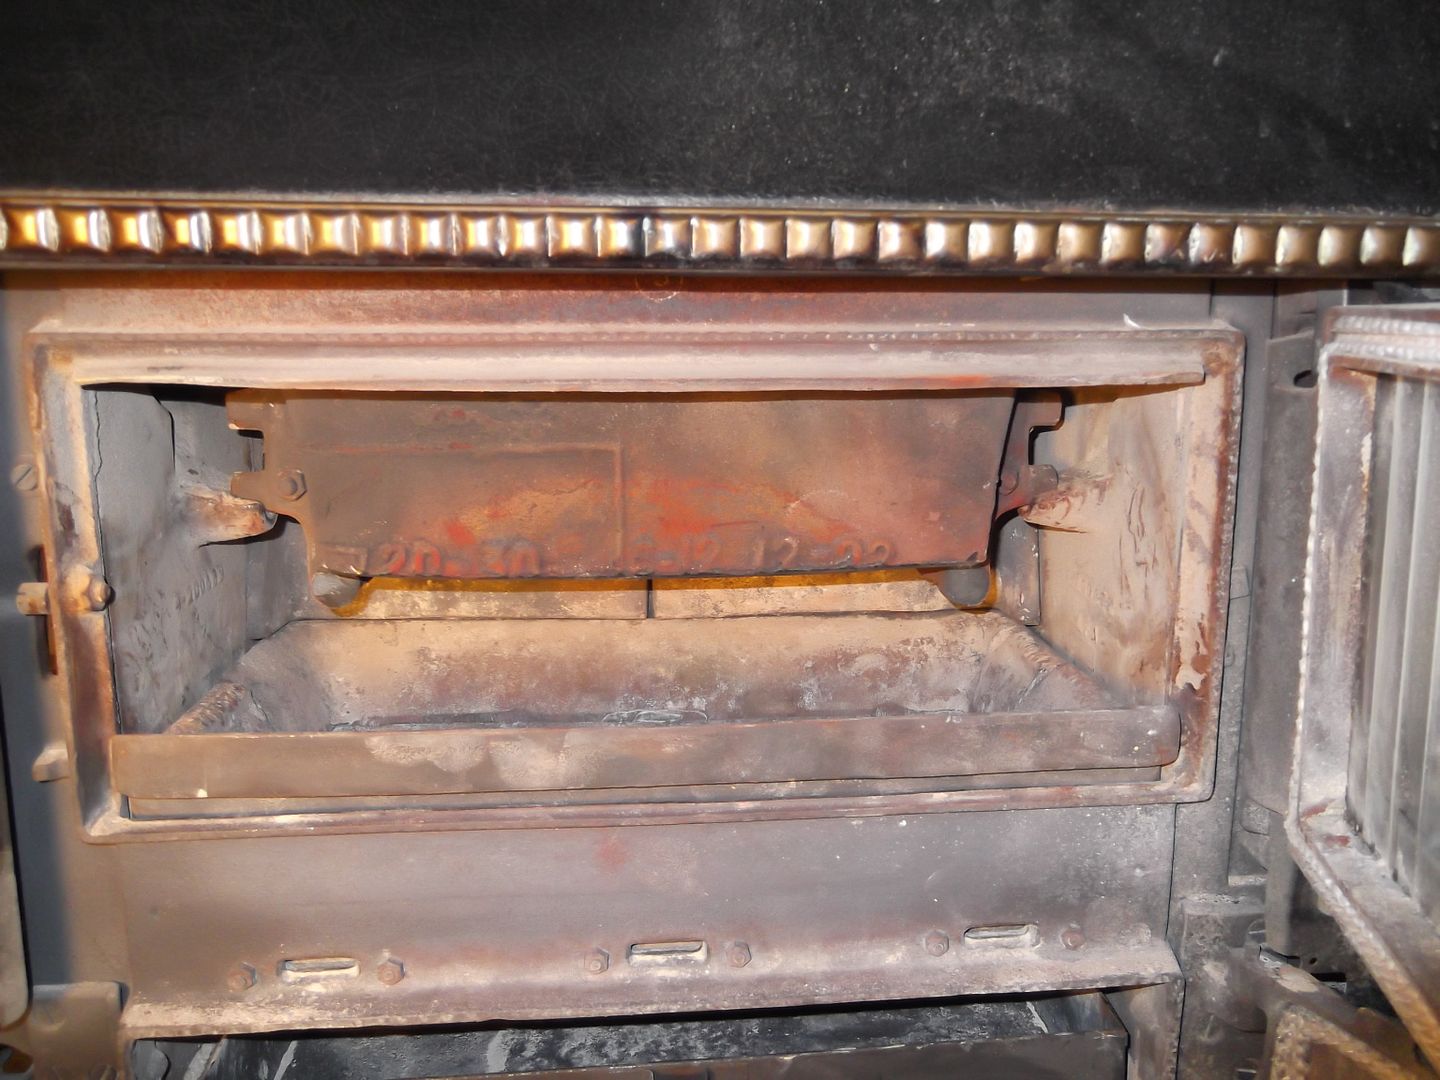
Seeing the hopper is in serious need of attention, (as noted by previous photos), since the stove was apart for cleaning, I figured (once again), to do a little more "trimming" on the bottom lip. The corrosion and distortion is pretty severe, and I'm surely not in the market to spend $400 on this thing, so once again, I took my trusty mason blade, in my cheap 7 1/4 circular saw, and began carving away, again.
Before
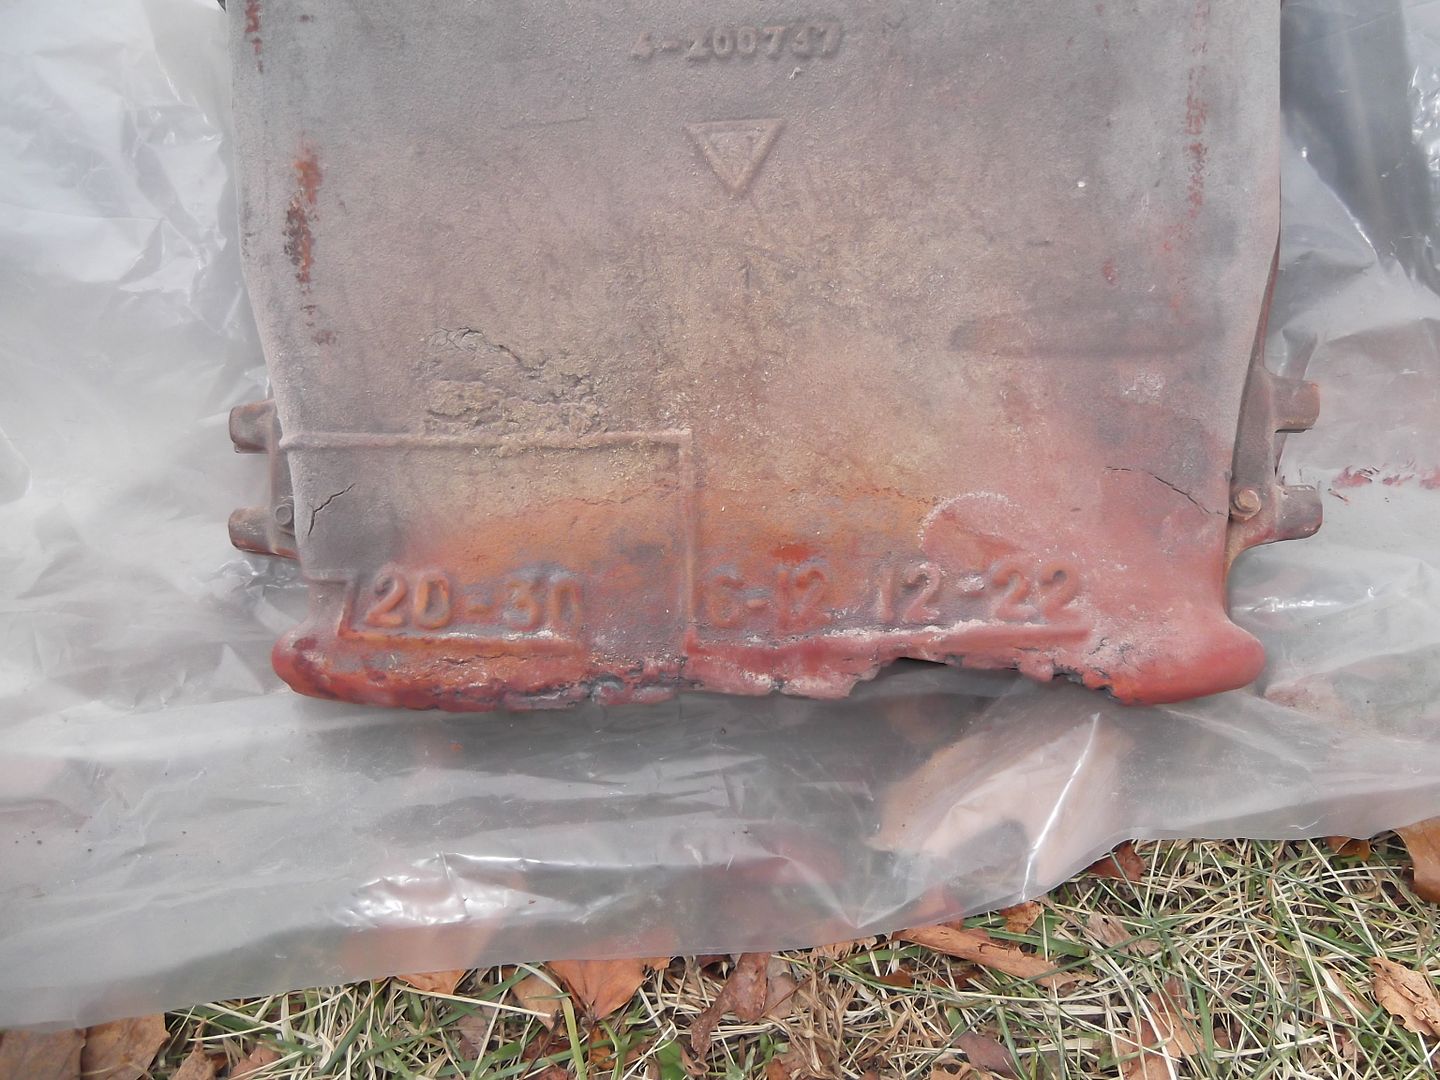
after
Not a good view, but you get the idea. Trying not only to clean it up, but reduce the throat restriction. Also, by cutting an inch and a half off the bottom, maybe my coal bed will increase a bit in size.
Before


after

Not a good view, but you get the idea. Trying not only to clean it up, but reduce the throat restriction. Also, by cutting an inch and a half off the bottom, maybe my coal bed will increase a bit in size.
-
warminmn

- Member
- Posts: 8190
- Joined: Tue. Feb. 08, 2011 5:59 pm
- Location: Land of 11,842 lakes
- Hand Fed Coal Stove: Chubby Junior, Riteway 37
- Coal Size/Type: nut and stove anthracite, lignite
- Other Heating: Wood and wear a wool shirt
If the hopper cutting makes the coal hit the window, put something in the stove to block it from that. Ive got a thick piece of metal in front of my window but anything non flammable would work.
-
franco b
- Site Moderator
- Posts: 11417
- Joined: Wed. Nov. 05, 2008 5:11 pm
- Location: Kent CT
- Hand Fed Coal Stove: V ermont Castings 2310, Franco Belge 262
- Baseburners & Antiques: Glenwood Modern Oak 114
- Coal Size/Type: nut and pea
A deeper coal bed will make a difference. Be sure the coal does not want to come out the door now. You might have to put some sort of plate there to prevent that.
-
joeq
- Member
- Posts: 5743
- Joined: Sat. Feb. 11, 2012 11:53 am
- Location: Northern CT
- Hand Fed Coal Stove: G111, Southard Robertson
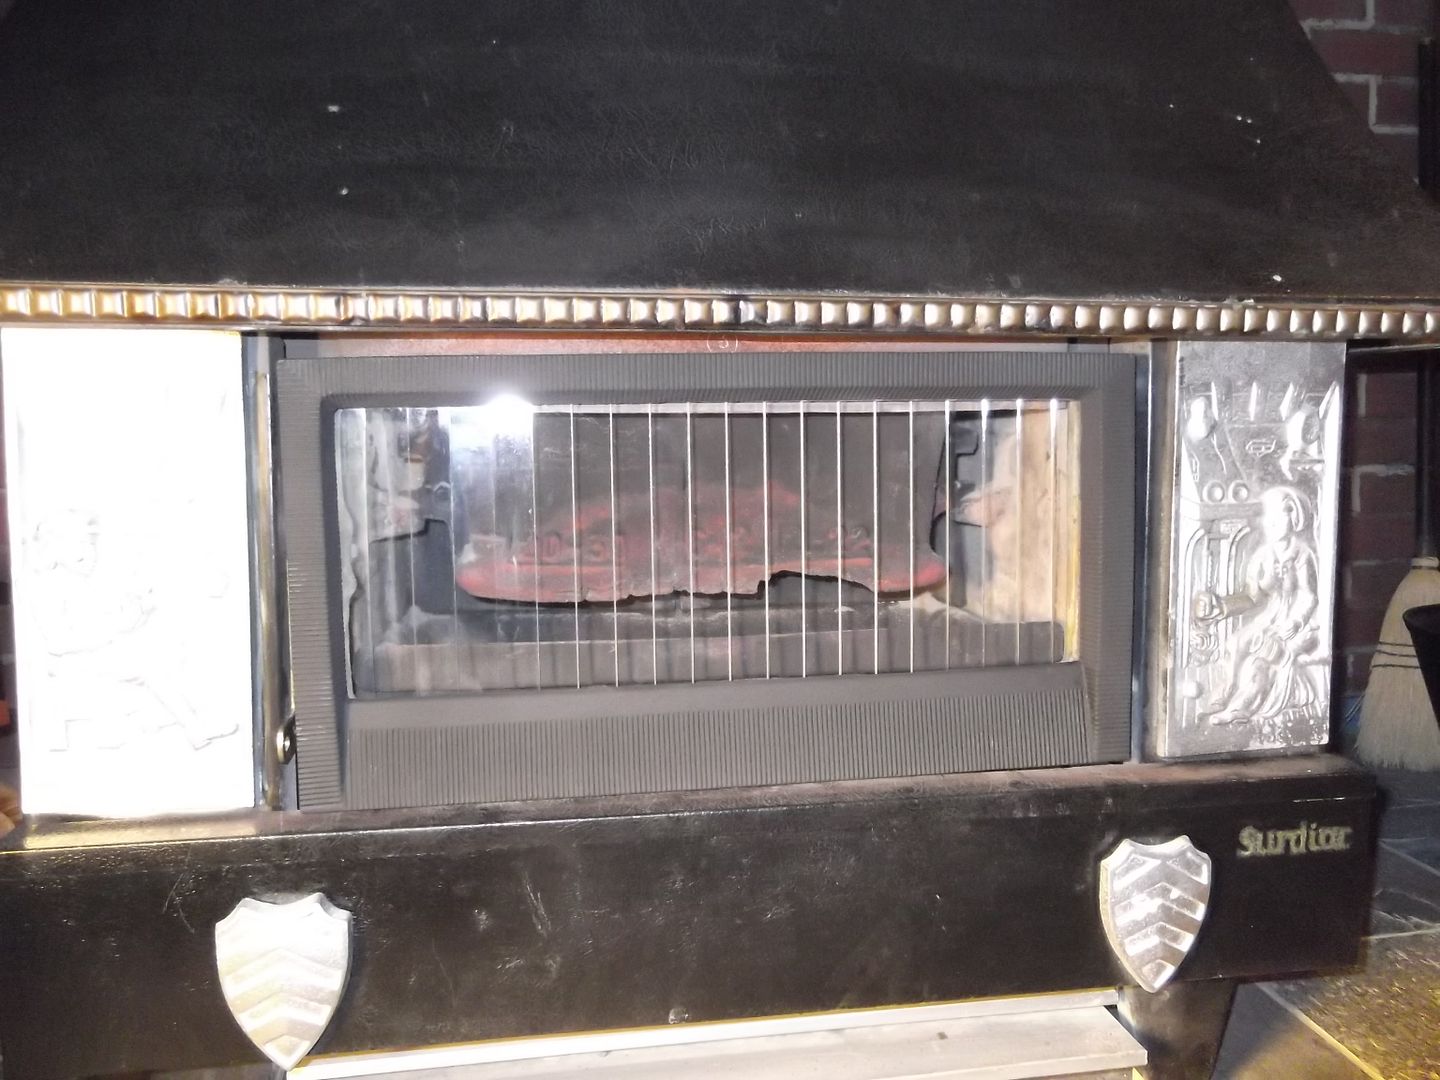
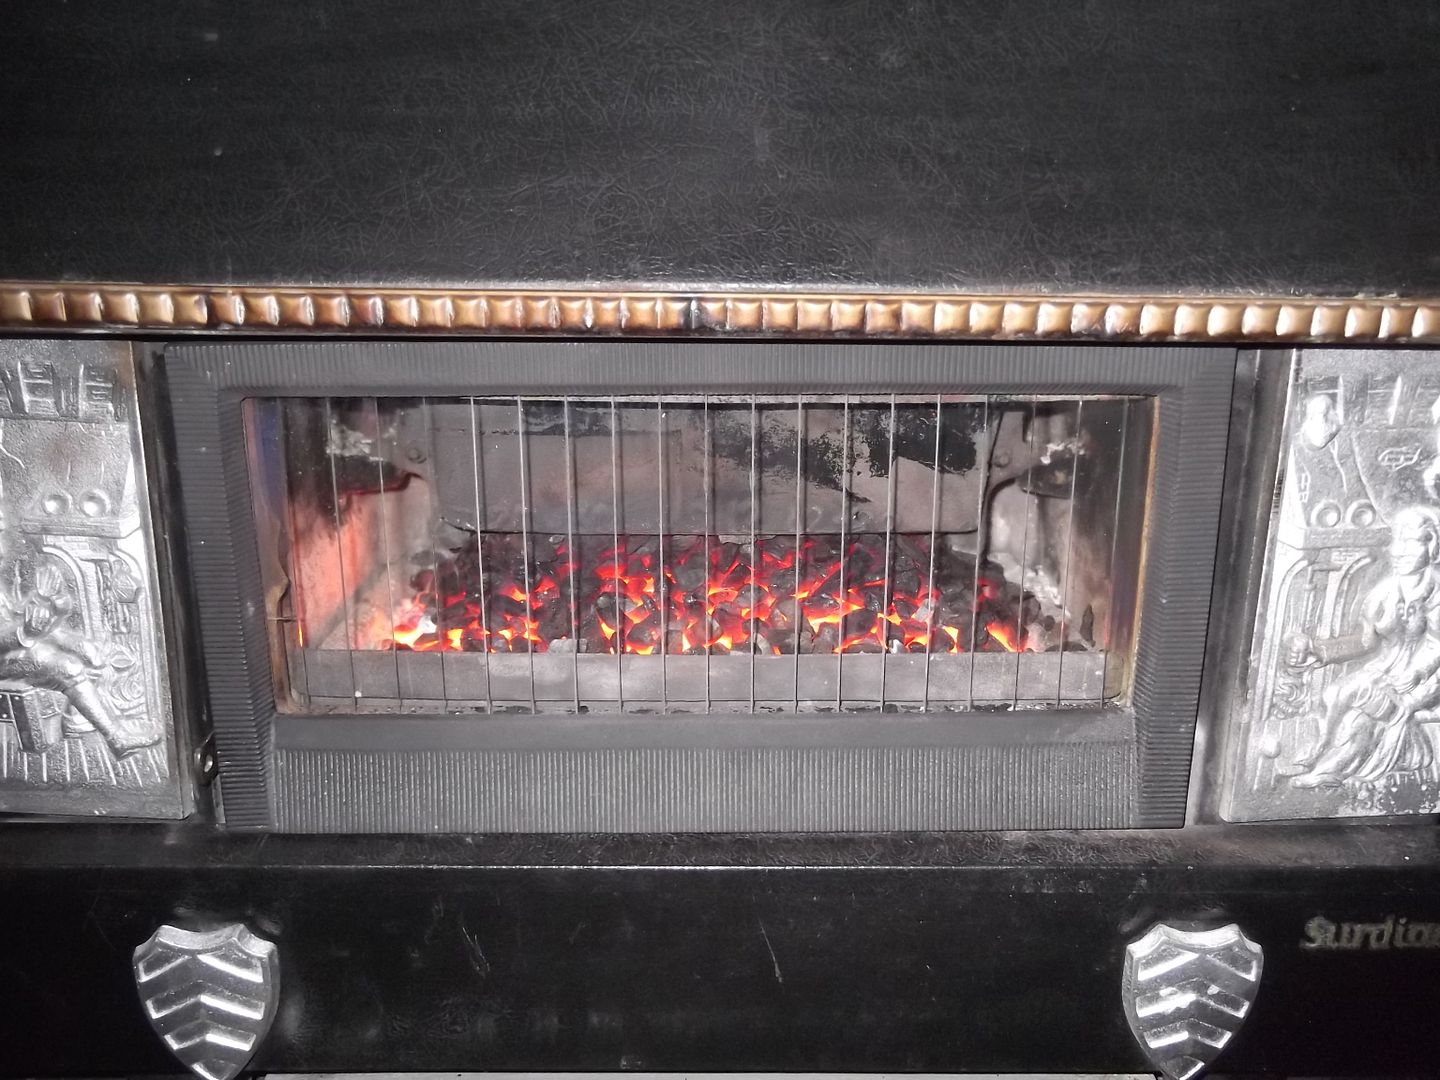
It appears there's not a problem with the coal bed overflowing. I've got some more pics I'll post tomorrow, men. Well, maybe I can squeeze a couple in for now. The color or camera doesn't do this one any justice, but there's a bunch of blue ladies there, that the digital just won't capture. (At least my glass is clean again.) Naturally, the top one is B4.


-
confedsailor

- Member
- Posts: 472
- Joined: Tue. Mar. 12, 2013 9:46 pm
- Location: Moosup Ct
- Hand Fed Coal Boiler: 100 KBtu Chappee
- Hand Fed Coal Stove: Surdiac 513
- Other Heating: Oil Fired 1950"s American Standard Arcoliner 132K BTU
Damn! That looks good, I'm going to have to try that. Furthermore, you're still on the high position on the hopper as well.
-
joeq
- Member
- Posts: 5743
- Joined: Sat. Feb. 11, 2012 11:53 am
- Location: Northern CT
- Hand Fed Coal Stove: G111, Southard Robertson
thanx guys.
Here's a few pics of the yesterdays escapades.
Notice the ash buildup on the edges and shelving.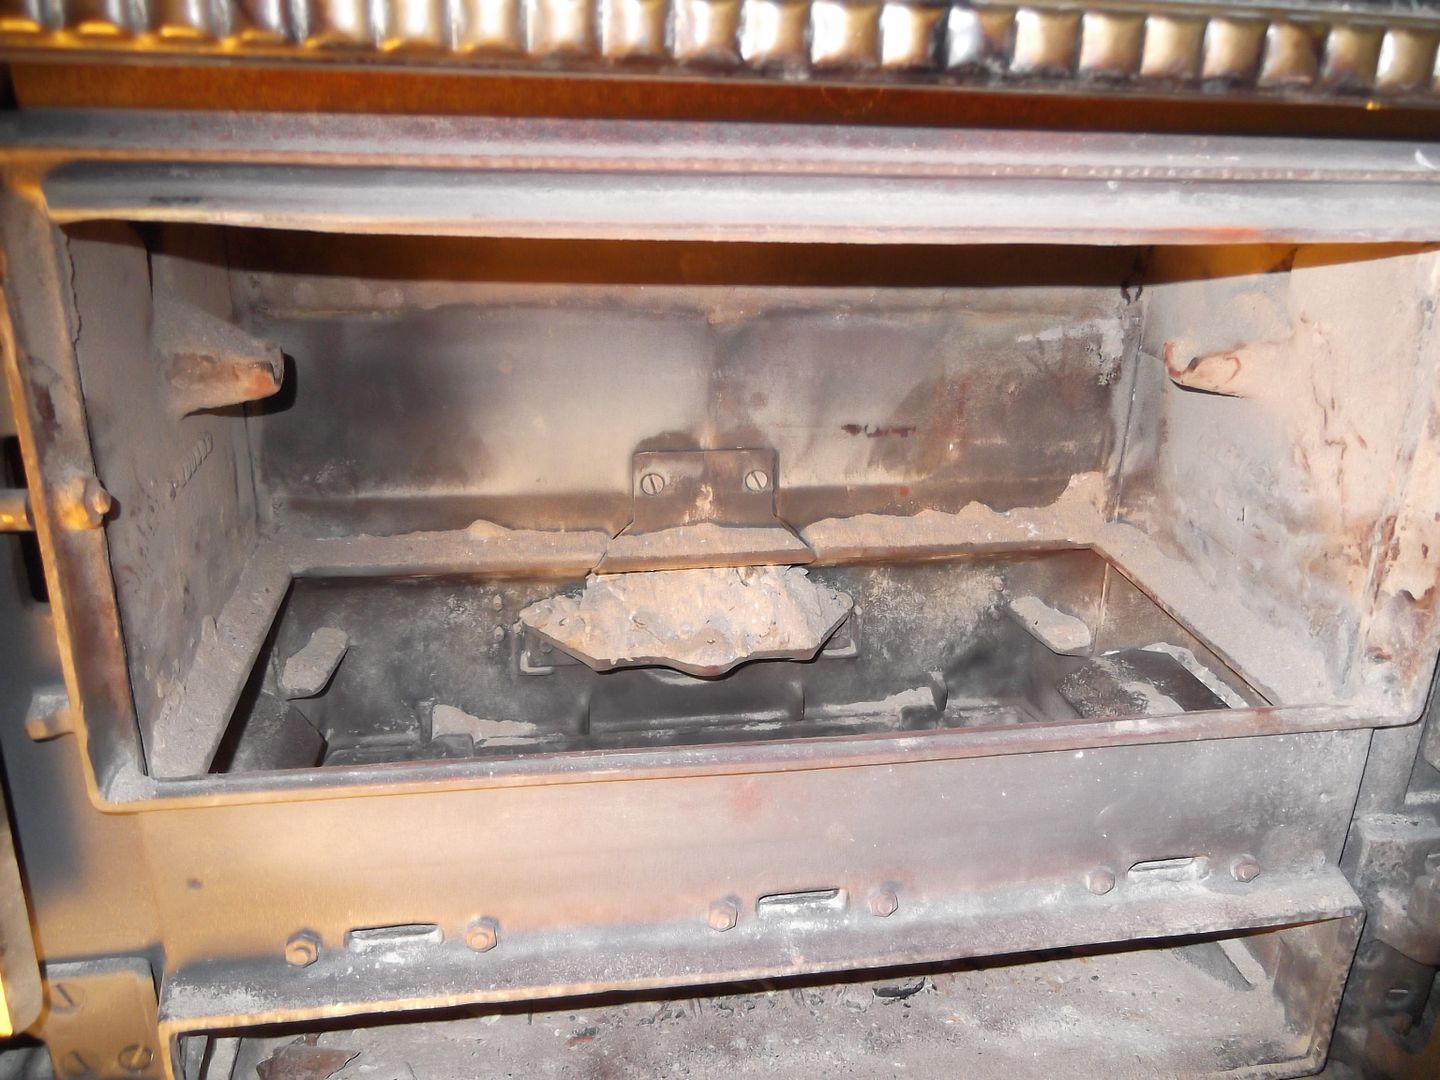
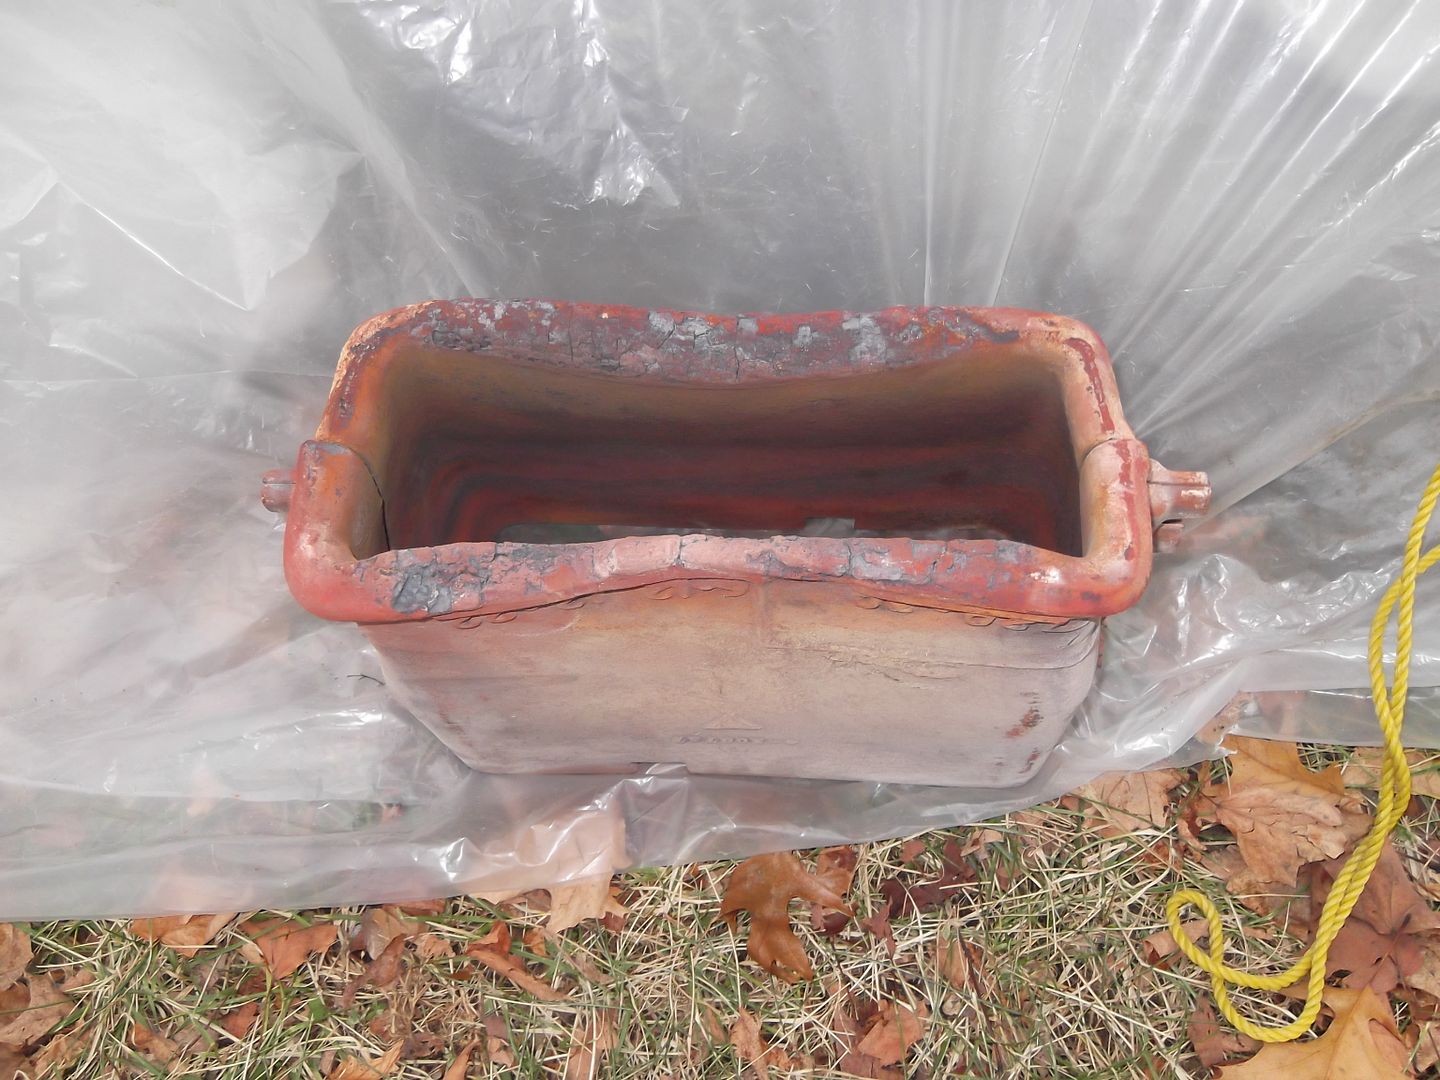
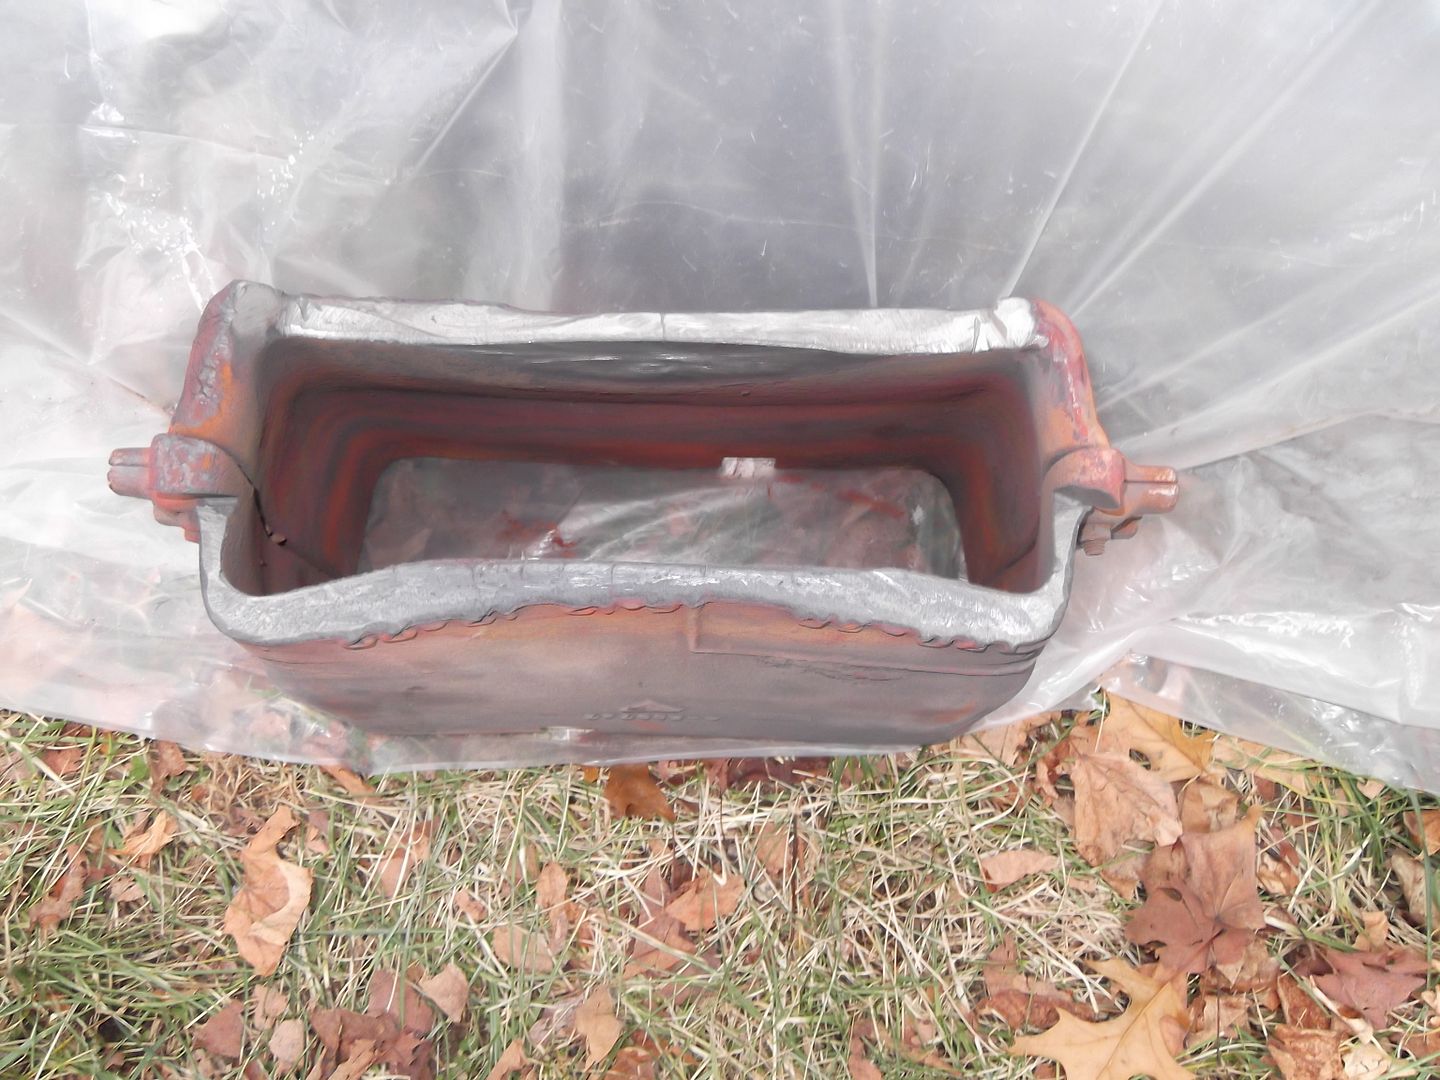
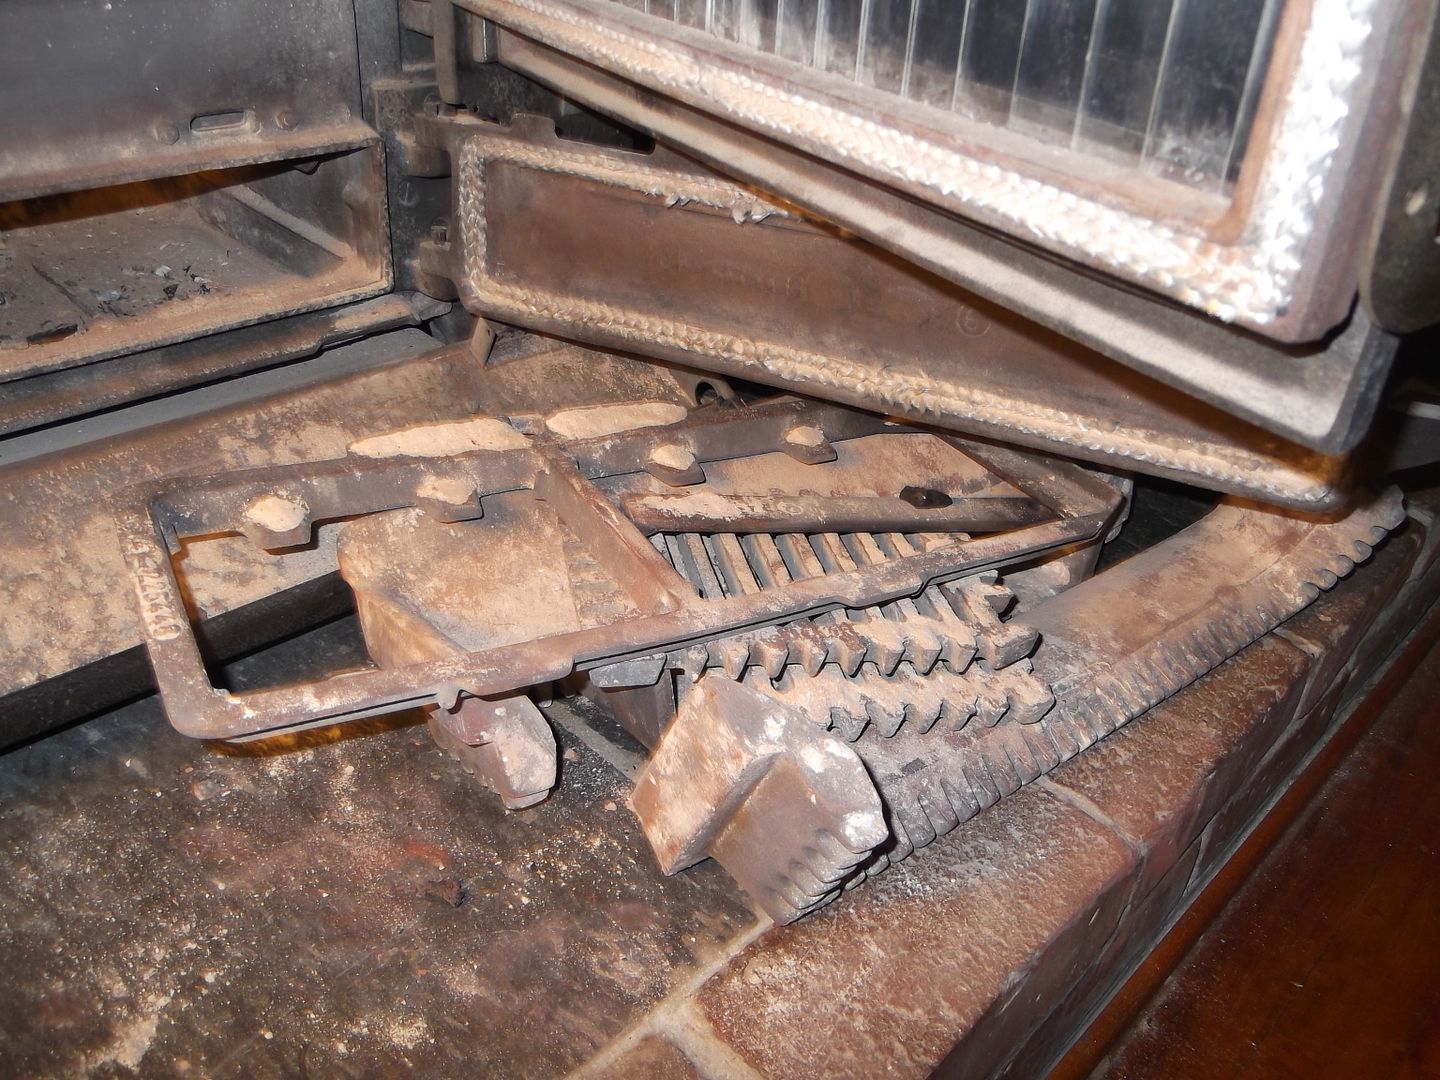
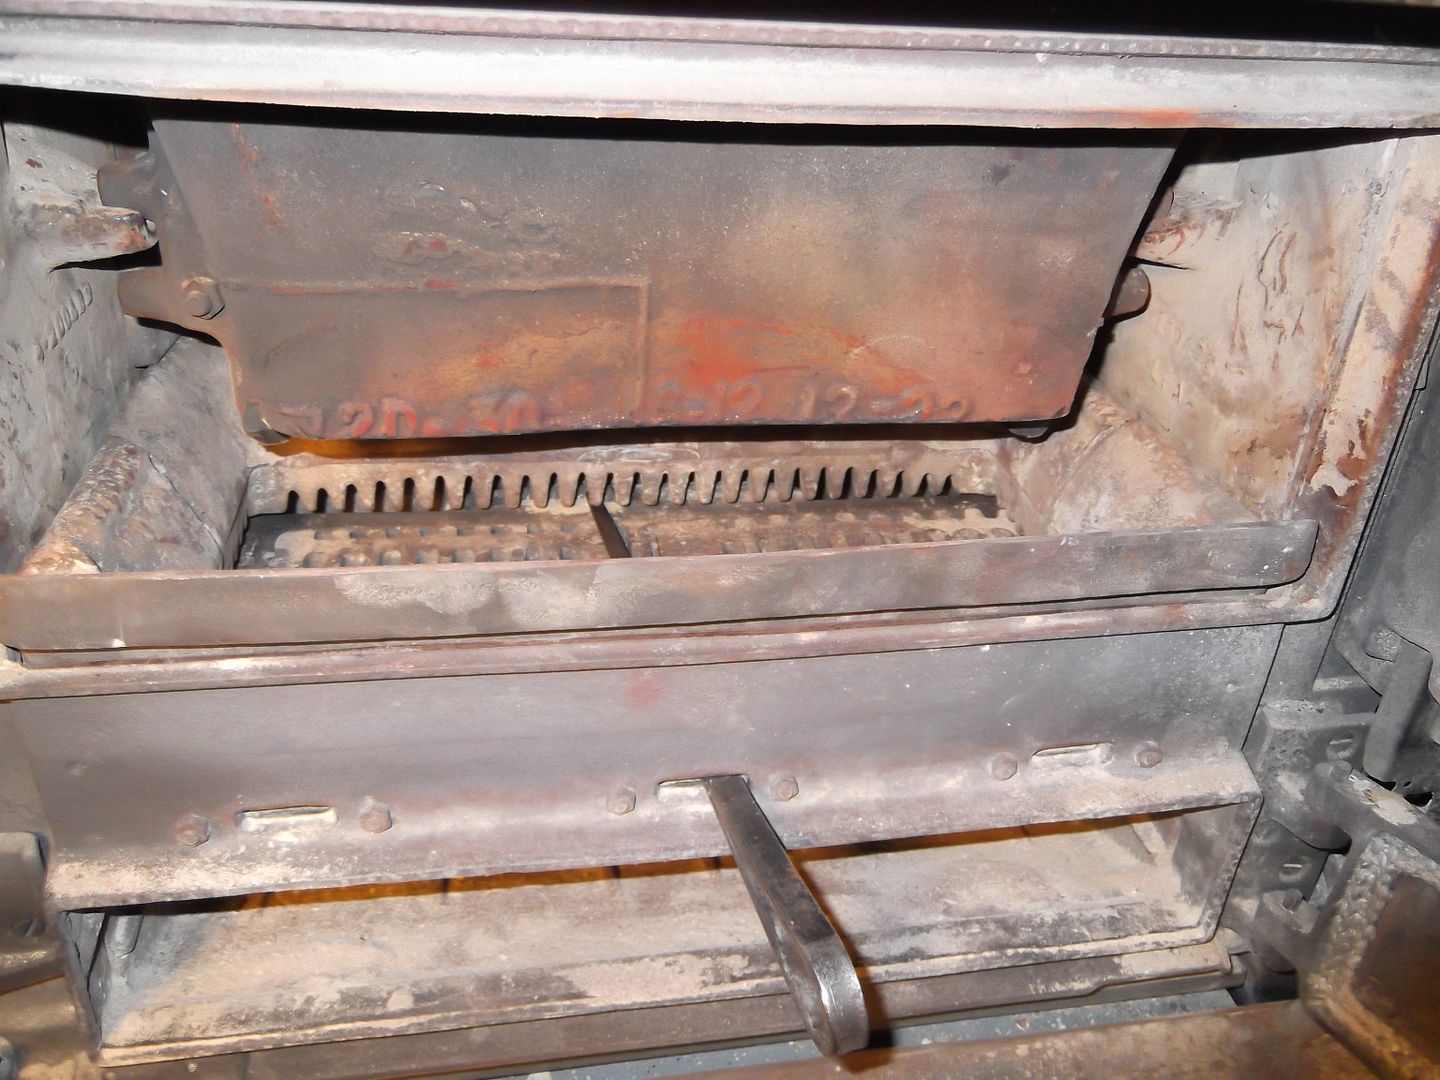
And here's the pile of dirty guts, Notice the teeth on the lower section of the aprons. (One of them is the component on the very bottom)
This photo shows the pieces back together after cutting the bottom of the hopper. The apron serrations are visible, and this is where the accumulated ash "grows" to choke down the breathing abilities as time goes on. Thr hopper is mistakenly sitting in its lower position.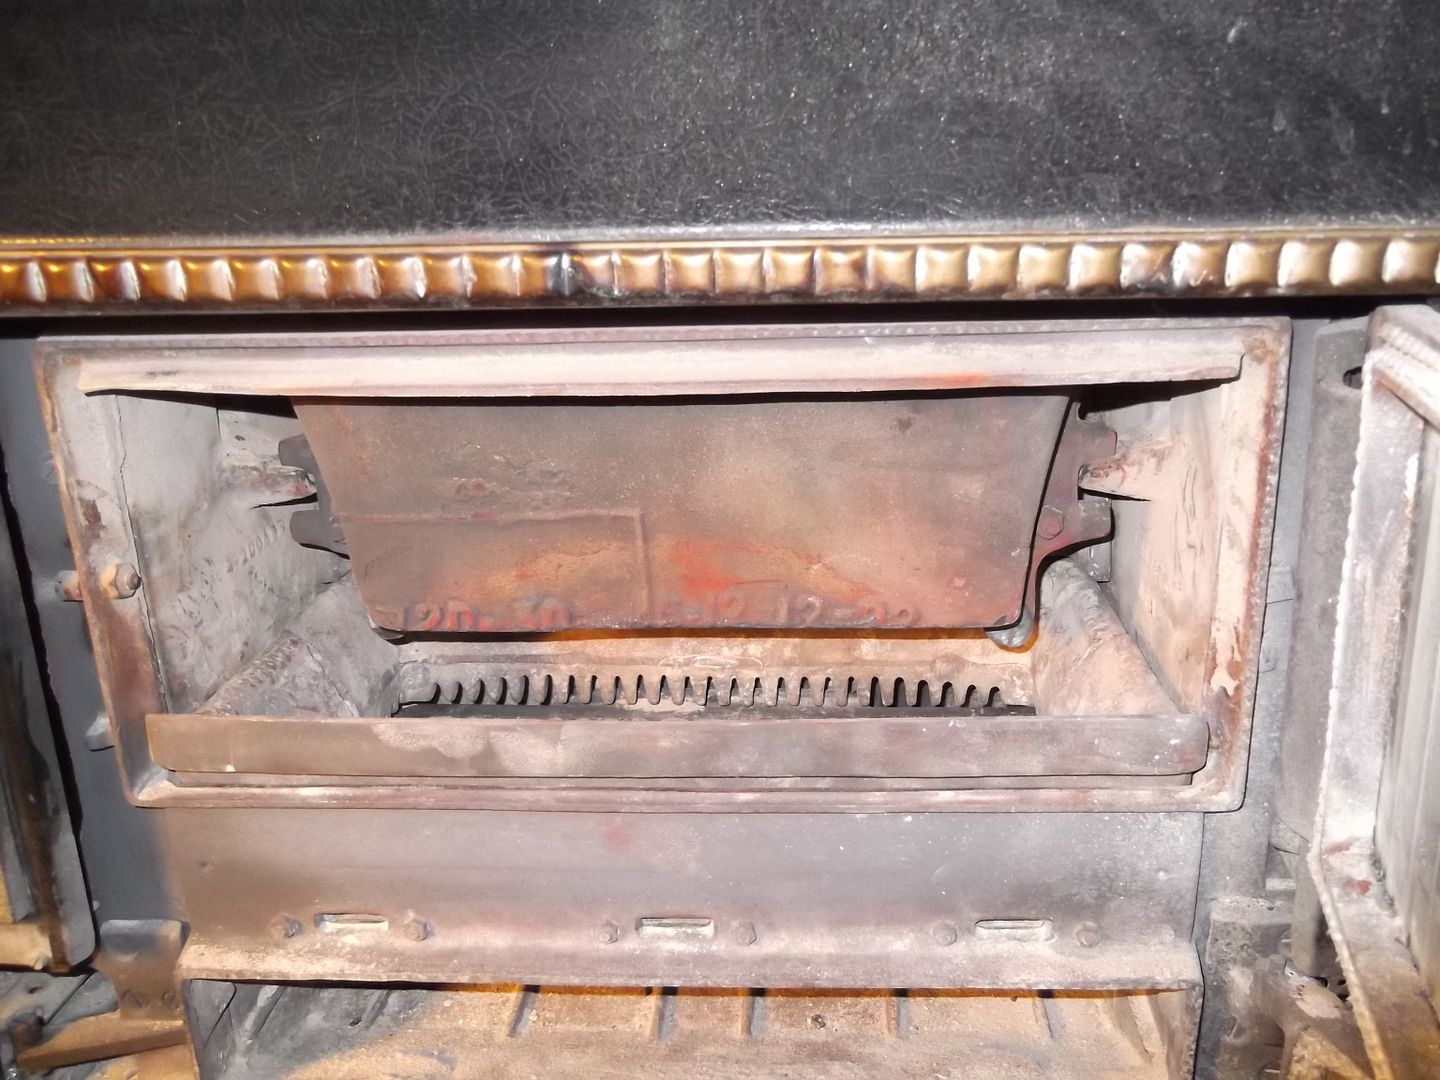
Here it is, raised up, with added clearance for a larger burning coal pile. (Hopefully)
For some reason, after initial fire-up, I can't get my manometer to go higher than -.03. even with the baro-damper blocked. The fire was blazing hot, MPD and thermostat wide open, yet a piddly -.03 draft. I don't get it. but it was the 1st day, so maybe things will settle in, in time.
Here's a few pics of the yesterdays escapades.
Notice the ash buildup on the edges and shelving.

And here's the pile of dirty guts, Notice the teeth on the lower section of the aprons. (One of them is the component on the very bottom)

This photo shows the pieces back together after cutting the bottom of the hopper. The apron serrations are visible, and this is where the accumulated ash "grows" to choke down the breathing abilities as time goes on. Thr hopper is mistakenly sitting in its lower position.

Here it is, raised up, with added clearance for a larger burning coal pile. (Hopefully)

For some reason, after initial fire-up, I can't get my manometer to go higher than -.03. even with the baro-damper blocked. The fire was blazing hot, MPD and thermostat wide open, yet a piddly -.03 draft. I don't get it. but it was the 1st day, so maybe things will settle in, in time.
-
joeq
- Member
- Posts: 5743
- Joined: Sat. Feb. 11, 2012 11:53 am
- Location: Northern CT
- Hand Fed Coal Stove: G111, Southard Robertson
Here is one other "adjustment" I made to the all important riddling tool. As I mentioned previously, this thing needs to be utilized with the "hoop" in the up-ward position, so as to allow maximum penetration to the rear of the stove, while riddling through the 3 ports. If this thing is up-side down, it'll hit the ash pan door, and prevent the depth needed to clear the back aprons of ash. My tool has become slightly worn, and the tip was as pointy as a hunting knife. I don't believe this to be too effective when trying to evacuate all the ash at the back of the stove. So I cut the end about 1/4" to make the tip more blunt, in the hopes of it being able to "push" more ash off the back areas. however, because I removed some of the tip, it reduced the length of the bar, so I also cut a larger amount off the handle end. This is the cut-line, which is about 1/2".
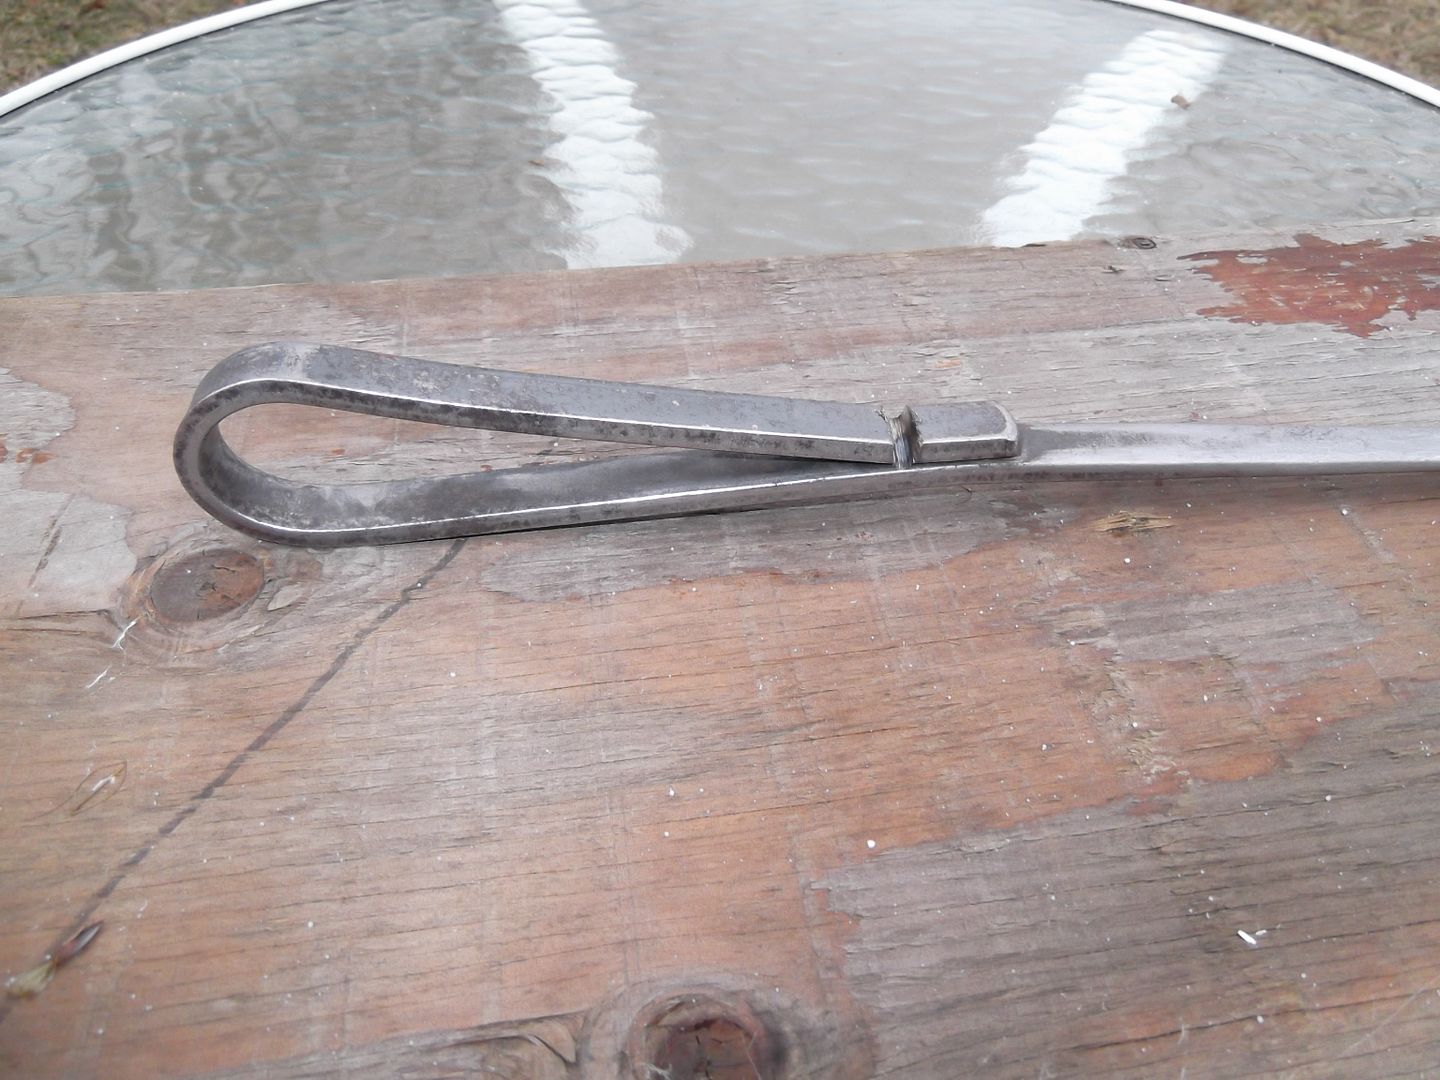
Once the waste was removed, it gave me the needed clearance, to clear the back of the stove.
I know it doesn't sound like much, but we need as much help as possible to gain the advantage of making these stoves perform up to their "advertized" potential.
I've also temporarily gone back to burning Blaschac, only because the bags were more accessible, and easier to lift when I was sick last week. Was this a reason for the reduced performance of my stove, when it went out? It took a couple days of burning Blaschac to clear the stove of the Kimmel. Then the fire went out. Coincidental? I've refired this thing on Baschac 'cause it was in the skuttle. But now that it's up and running, I'm going to re-instate Kimmel, and see if it performs any differently, time wise, ash wise, and draft wise.

Once the waste was removed, it gave me the needed clearance, to clear the back of the stove.

I know it doesn't sound like much, but we need as much help as possible to gain the advantage of making these stoves perform up to their "advertized" potential.
I've also temporarily gone back to burning Blaschac, only because the bags were more accessible, and easier to lift when I was sick last week. Was this a reason for the reduced performance of my stove, when it went out? It took a couple days of burning Blaschac to clear the stove of the Kimmel. Then the fire went out. Coincidental? I've refired this thing on Baschac 'cause it was in the skuttle. But now that it's up and running, I'm going to re-instate Kimmel, and see if it performs any differently, time wise, ash wise, and draft wise.
-
Lightning

- Site Moderator
- Posts: 14669
- Joined: Wed. Nov. 16, 2011 9:51 am
- Location: Olean, NY
- Stoker Coal Boiler: Modified AA 130
- Coal Size/Type: Pea Size - Anthracite
Chimney might need to warm up a bit. See how it responds after a day.joeq wrote:For some reason, after initial fire-up, I can't get my manometer to go higher than -.03. even with the baro-damper blocked. The fire was blazing hot, MPD and thermostat wide open, yet a piddly -.03 draft. I don't get it. but it was the 1st day, so maybe things will settle in
-
confedsailor
- Member
- Posts: 472
- Joined: Tue. Mar. 12, 2013 9:46 pm
- Location: Moosup Ct
- Hand Fed Coal Boiler: 100 KBtu Chappee
- Hand Fed Coal Stove: Surdiac 513
- Other Heating: Oil Fired 1950"s American Standard Arcoliner 132K BTU
I did something similar with 1/8X1/2" steel bar, I made it about 18 inches long so it can get to the back without busting my knuckles on the door. Also I hammered the point out flat and sharp, like a spade nose, then hardened as much as I could with a water quench. It works quite well.
-
joeq
- Member
- Posts: 5743
- Joined: Sat. Feb. 11, 2012 11:53 am
- Location: Northern CT
- Hand Fed Coal Stove: G111, Southard Robertson
Here's a few more random pix for your viewing pleasure.
This is a view looking down the top loading door. The mouth of the hopper is visible, and even tho it has some distortion, it's not as bad as it was B4. It now seems to allow the pea coal to drop a tad more freely.
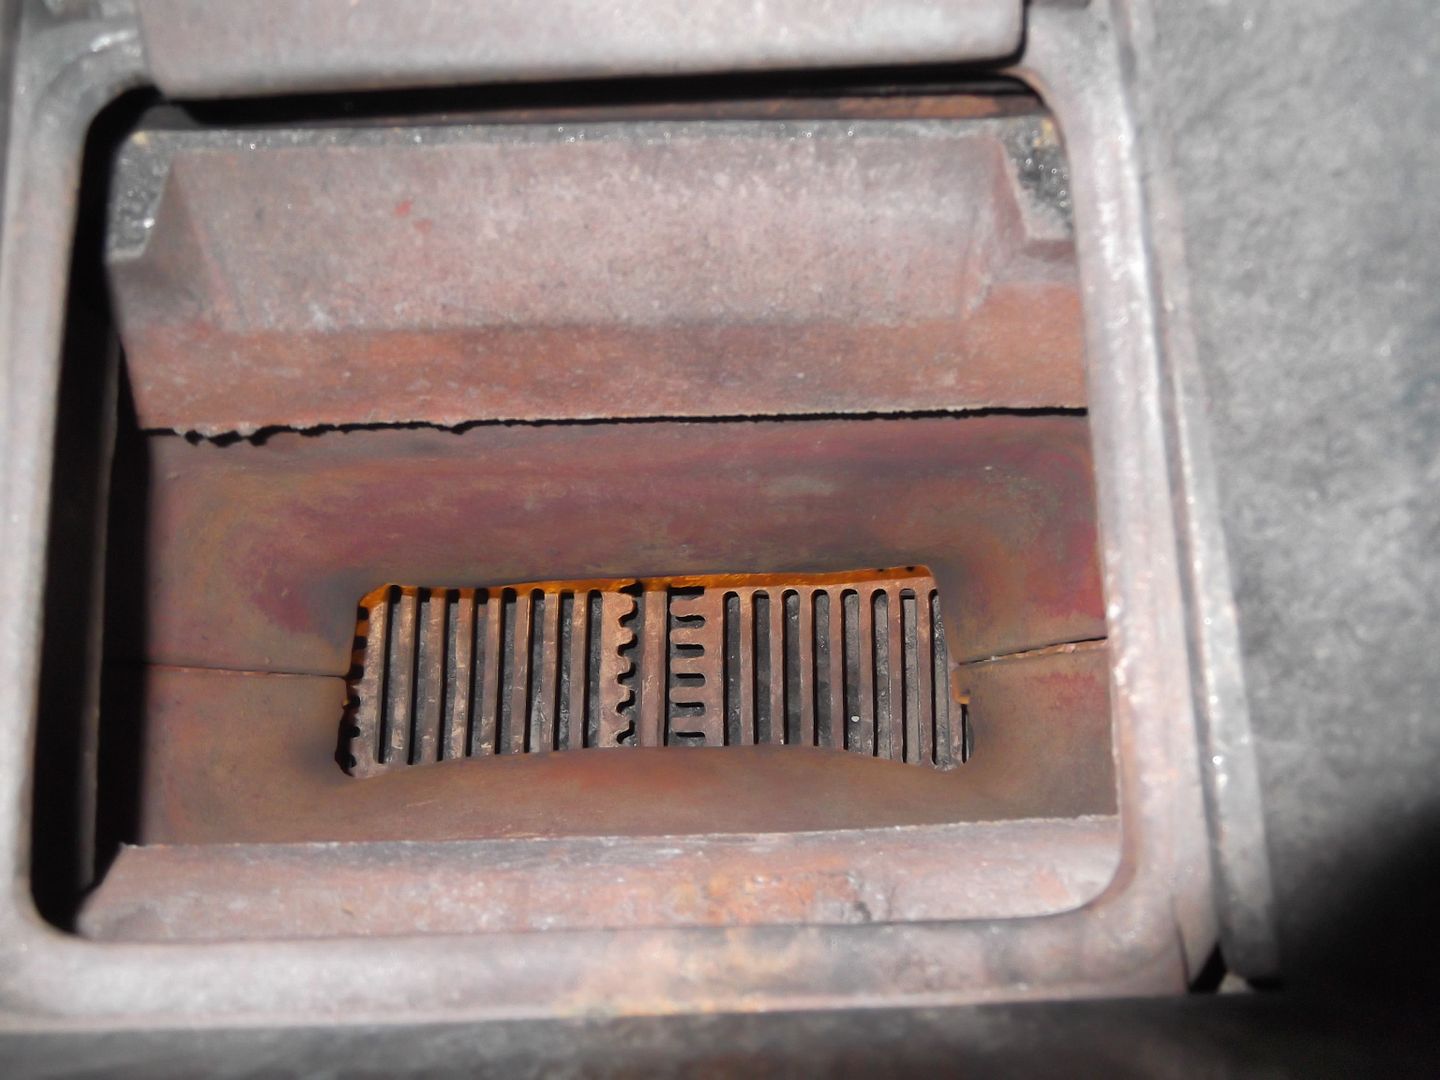
And this photo is how the video instructs to start a fire in this stove. With news paper on either side of the firebox, it'll immediately sends the flames, and heat out the side ports to aid in initiating the draft.
Also, the kindling is stacked to the rear of the stove, and coal packed to the front, to reduce the orange flames, which tend to smoke, and char the glass on the front door.
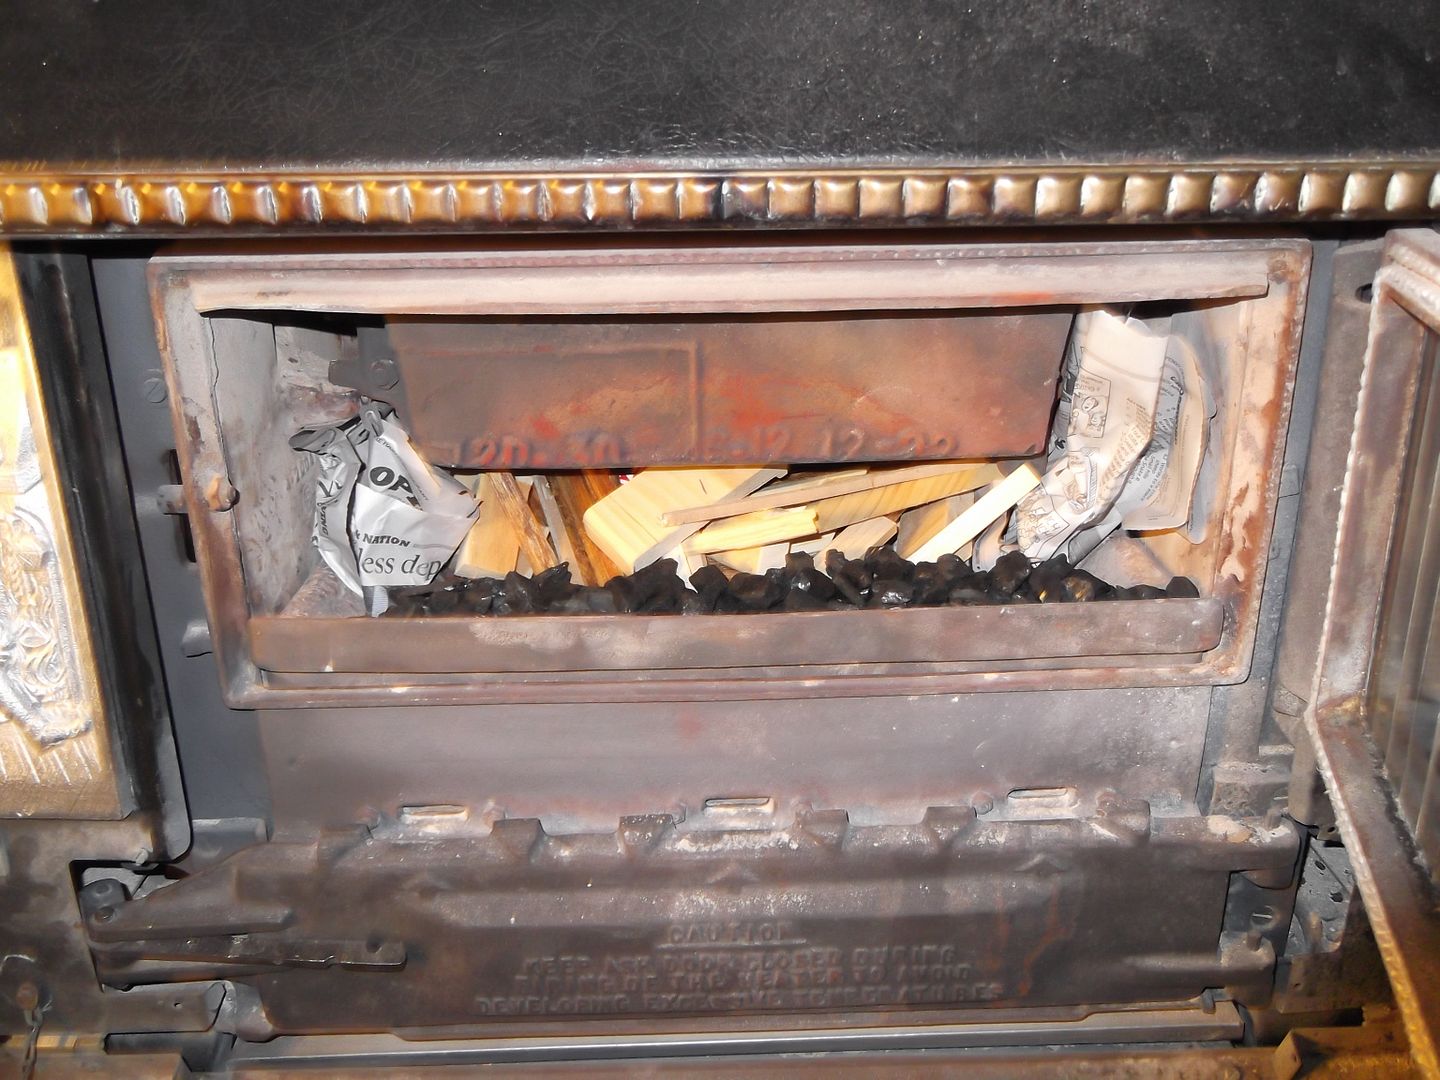
And because of the new glass panes, I wasn't about to take any chances, so I also temporarily covered the glass with a sheet of tin-foil. And the little fan, blowing up the grates, through the open ash pan door, greatly helps fuel the fire. (Of course, cracking open a door or window "immensely" aids in promoting a strong draft.).

This method worked well, and with-in an hour, there was very little smoke, and I was filling the hopper on a strong burning fire. In a week, I'll up-date on how the transition from Blaschac, to Kimmel works. To end this part of the day, I'll leave you with a picture, I already posted, but want to finalize the above chores, on a pleasing note, and not a negative one. Enjoy
-
franco b
- Site Moderator
- Posts: 11417
- Joined: Wed. Nov. 05, 2008 5:11 pm
- Location: Kent CT
- Hand Fed Coal Stove: V ermont Castings 2310, Franco Belge 262
- Baseburners & Antiques: Glenwood Modern Oak 114
- Coal Size/Type: nut and pea
You should get increased burn time between tending with the larger load of coal burning. The picture looks like the hopper is not filled. I expected more coal in the fire pot.
